Pantheon

Pantheon is a Drupal and WordPress WebOps platform that hosts over 300,000 pages in the cloud and supports over 10 billion page views every month. Pantheon’s container-based, multi-tenant architecture allows businesses to access all of their websites from a single dashboard.

How to Limit Access to WordPress Admin by IP Address

There are several ways to limit or restrict WordPress admin access by IP address.

Add some code to your wp-config file to restrict access to the WordPress admin area. Here are the steps:

  1. Log in to your website’s server using an FTP app like Filezilla or the file manager in your hosting control panel.
  2. Locate the wp-config file in the root directory of your WordPress installation.
  3. Download the wp-config.php file to your computer and open it in a text editor.
  4. Add the following code to the wp-config.php file:
/* Add any custom values between this line and the "stop editing" line. */

$ip_allowlist = [
   159.223.78.3,
   193.56.29.113,
   178.62.113.151,
   80.76.51.210,
   193.201.9.202,
   45.227.254.22,
];
$ip =  $_SERVER['REMOTE_ADDR'];

if ( preg_match( '/(wp-login.php)/', $_SERVER['REQUEST_URI'] ) ) {
    $ip_found = in_array( $ip, $ip_allowlist, true );

	if ( ! $ip_found ) {
		// Check if this IP is in CIDR 
		foreach ( $ip_allowlist as $_cidr ) {
			if ( strpos( $_cidr, '/' ) !== false ) {
				$_ip = ip2long( $ip );
				// expand the range of ips.
				list ( $_net, $_mask ) = explode( '/', $_cidr, 2 );
				// subnet.
				$_ip_net  = ip2long( $_net );
				$_ip_mask = ~( ( 1 << ( 32 - $_mask ) ) - 1 );
				if ( ( $_ip & $_ip_mask ) === ( $_ip_net & $_ip_mask ) ) {
					$ip_found = true;
					break;
				}
			}
		}
	}
	if ( ! $ip_found ) {
		header( 'HTTP/1.0 403 Forbidden' );
		exit;
	}
}

Replace xxx.xxx.xxx.xxx with the IP address that you want to allow access to the WordPress admin area. If you have multiple IP addresses, you can add one per line.

  1. Save the changes to the wp-config.php file.
  2. Upload the modified wp-config.php file back to your server, overwriting the original file.

After following these steps, only the specified IP addresses will have access to the WordPress admin area. Any other IP addresses trying to access the admin area will receive a 403 Forbidden error.

Alternatively, you can use the plugin Traffic Jammer that I wrote.
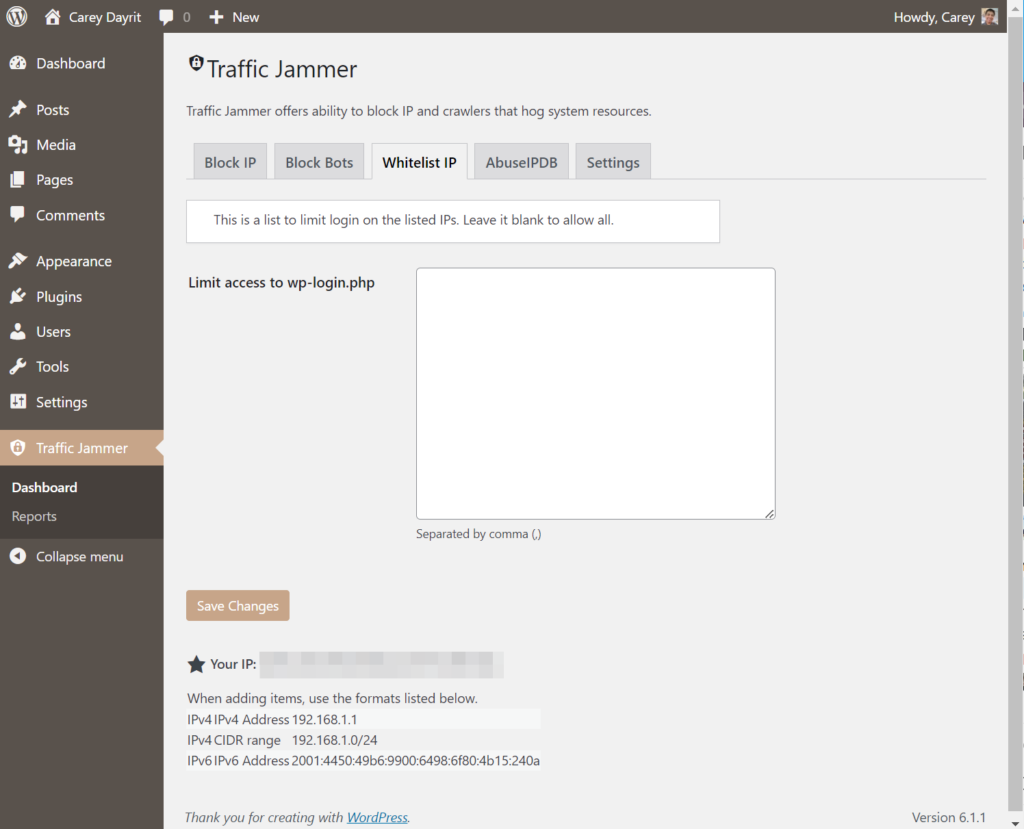
There is also a wp-cli command that is included in the plugin, here are the commands:

wp jam trust <IP> – add IP to the allowed list

wp jam untrust <IP> – remove IP from the allowed list

wp jam trustall – clear all limits

This plugin can also be used on the Pantheon terminus command, the plugin is very compatible with Pantheon no need to assume write access or symlinks to properly install the plugin.

terminus wp <sitename>.<env> -- jam <commands>

Block IPs in WordPress on Pantheon

This article is about blocking IPs in Pantheon for sites using the WordPress CMS. Prevent unwanted traffic incidents that might result in site outages and billing overages.

Review the nginx-access.log.

Download the nginx-access.log on the LIVE environment. The logs can be accessed using SFTP or by using the provided script from Pantheon’s documentation. Be sure to combine all the logs for a day if the site plan has multiple application containers. Identify the IP that has the highest number of visits and verify it with https://www.abuseipdb.com/

$ cat ~/site-logs/nginx-access.log | awk -F\" '{print $8}' | awk '{print $1}' | sort -n | uniq -c | sort -nr | head -20

Use a WordPress Plugin to Block IPs

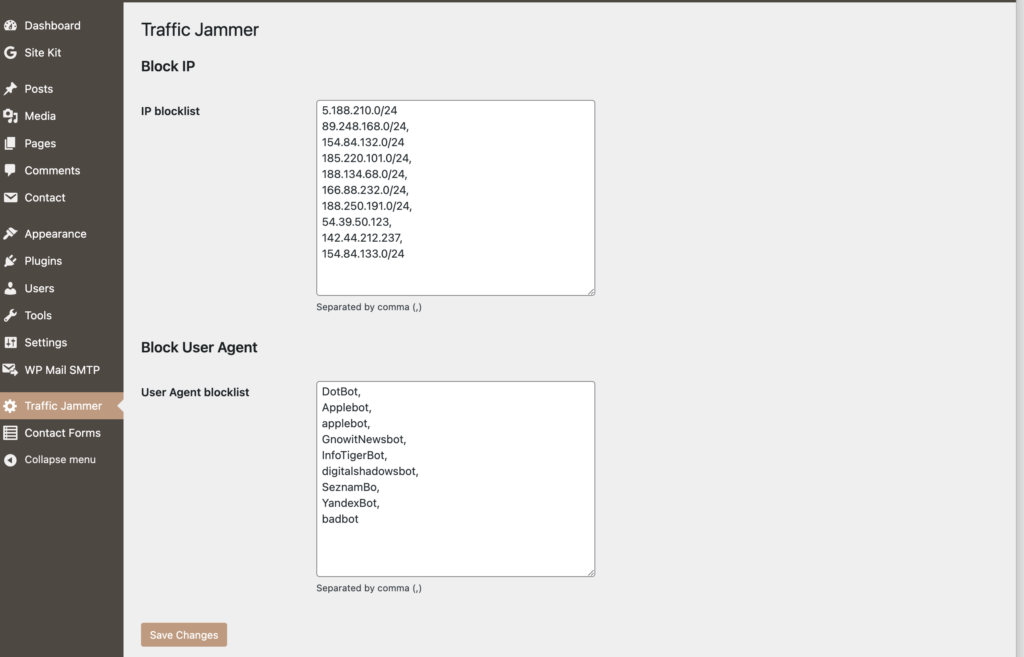
Be sure to install the plugin WP Traffic Jammer that can be downloaded at WordPress.org https://wordpress.org/plugins/traffic-jammer. The plugin has a wp-cli command that can be used on a remote wp-cli call using Terminus. It also has a settings page to add a single IP or an IP range.

Block the IP using Terminus.

Use remote wp-cli via terminus to block the IP.

$ terminus wp <sitename>.<env> -- jam block <ip>

To unblock the IP.

$ terminus wp <sitename>.<env> -- jam unblock <ip>

Block the IP on the WordPress Admin Dashboard.

On the Admin Dashboard, you would see the left side menu, click “Traffic Jammer” and add a single IP or IPs, CIDR format can be also used for IP ranges.

Block the IP using a PHP Snippet

Use a PHP snippet that can be added to wp-config.php file. This offers an advantage since it would be triggered before loading all the plugins and themes.

if ( $_SERVER['REMOTE_ADDR'] == '154.84.133.8' ) {
  header( 'HTTP/1.0 403 Forbidden' );
  exit;
}

Terminus 3

What a great way to start a new year with releases, as this is the same for the company offering the best WebOps SAAS (Software as a Service) Platform which is Pantheon. During the last week of December, a new version tag of Terminus has been released, comes version 3.

What is Terminus?

The Terminus command-line interface provides advanced interaction with Pantheon. Terminus enables you to do almost everything in a terminal that you can do in the Pantheon Dashboard, and much more. In practice, some of the features missing on the Dashboard are included in Terminus. Developers can also include in development workflow or as part of a script for deployment using continuous integration.

Operating System Compatibility

As of this writing tested to work on the following platforms

  • MacOS
  • Windows 10 – WSL 2 Ubuntu 20.0
  • Ubuntu 20.0 – this would include Ubuntu under Docker or VirtualBox

Before getting frustrated, included also are the list of platforms that Terminus would not work:

  • Windows 10 – Command Line
  • Windows 10 – Git Bash (MingW)
  • Ubuntu 18.0 and later versions
  • Linux system with coreutils equal to or less than 8.28

Prerequisites Library

  • PHP 7.4 or above
  • PHP Extensions (mbstring, xml, curl, cli)
  • curl
  • git (if you need to include plugins)

Installation

As for the prior version of Terminus, it can be installed in many ways, the new version is limited to work only on the standalone PHAR package. Assuming all the requirements are met. Start the installation on the home folder

cd ~
mkdir ~/terminus && cd ~/terminus 
curl -L https://github.com/pantheon-systems/terminus/releases/download/`curl --silent "https://api.github.com/repos/pantheon-systems/terminus/releases/latest" | perl -nle'print $& while m#"tag_name": "\K[^"]*#g'`/terminus.phar --output terminus
chmod +x terminus
sudo ln -s ~/terminus/terminus /usr/local/bin/terminus

Plugins

The new version of Terminus comes with a plugin manager, installation now can be done using the terminus command

terminus self:plugin:install pantheon-systems/terminus-build-tools-plugin

That would work if the plugin is added to packagist, don’t worry you can add an old plugin by means of adding the path.

terminus self:plugin:install <plugin_name> <path>

To update the latest version of the plugin from packagist:

terminus self:plugin:update <plugin_name>

To remove the plugin:

terminus self:plugin:uninstall <plugin_name>

WinSCP on Pantheon

WinSCP is a popular free SFTP and FTP client for Windows, a powerful file manager that allows you to upload and download files on the Pantheon server. It provides a user-friendly interface for copying files between a local and remote computer using the FTP or SFTP protocol. This software is available only on Microsoft Windows.

Main Features

  • All common operations with files
  • Graphical Interface
  • Integrated text editor
  • Scripting and task automation
  • Translated into many languages

A complete WinSCP guide and an active user forum are freely accessible at the WinSCP site.

Download WinSCP

If you don’t already have WinSCP installed on your computer, download the most recent update and install it from their website.

Open WinSCP

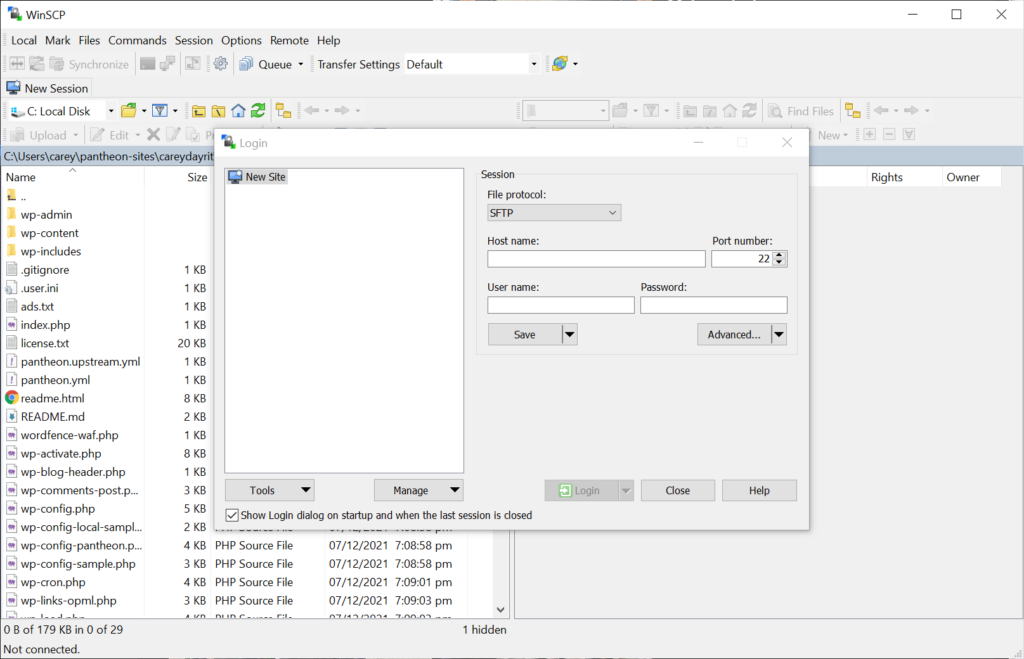
Open WinSCP by accessing the application on the Windows Start menu. Make sure you have your site’s Pantheon SFTP connection information on hand. See the guidelines on how to find the SFTP credentials for your site if you need to get the connection details.

WinSCP

Enter the details from the Site Dashboard Connection Info from Pantheon. Use the password that is being used when logging into the Pantheon User Dashboard. Do check the protocol must be in SFTP and the port number is 2222.

Alternatively, you can also have passwordless access by using an SSH private key. Pantheon doesn’t offer SSH access to a shell environment but it allows it to be used on SFTP protocol.

You should add your public SSH key into your Pantheon account to get the most out of it. SSH keys are a better option for authentication than a basic password since they provide additional security protection. No matter how many sites you work on, you will only need to do this once. See Generate and Add SSH Keys for further information.

Click the Advanced select button, under SSH then click Authentication. Enter a private key in PPK format.

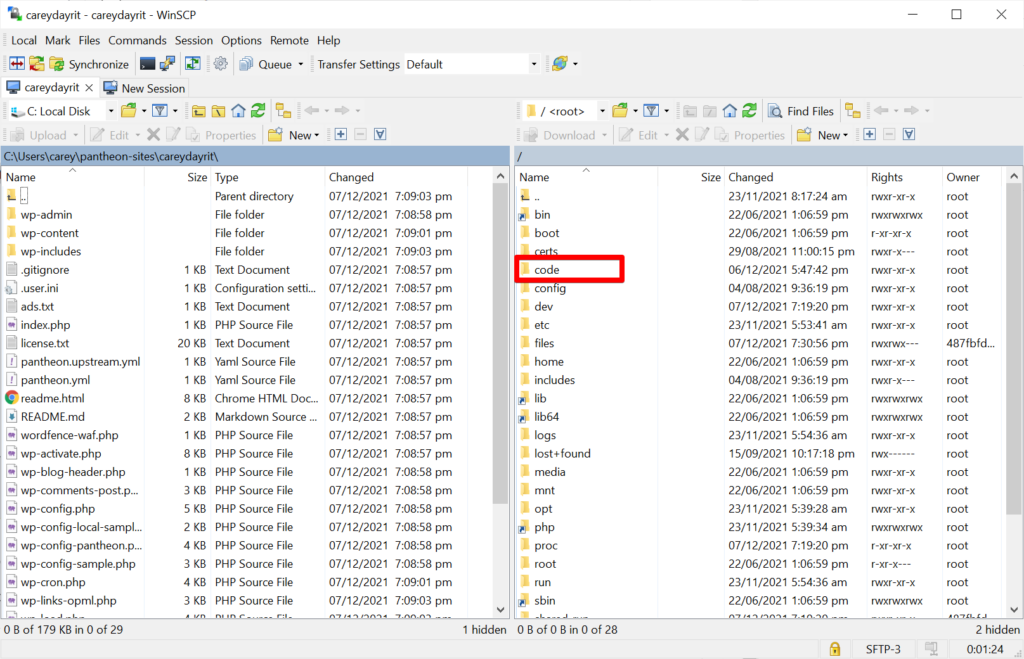
To get the site’s root simply navigate to the code folder and you will be able to download and upload files as normal.

Protecting WordPress login page thru Basic Authentication

Take steps to avoid brute force attacks on the WordPress admin dashboard page. This would add an additional layer to site security and avoid traffic excess. Basic Authentication would facilitate HTTP requests to require a username and a password.

Add Basic Authentication via .htaccess

This is applicable to sites using Apache as the web server, this would not work on hosts with Nginx as their web server. Two simple steps:

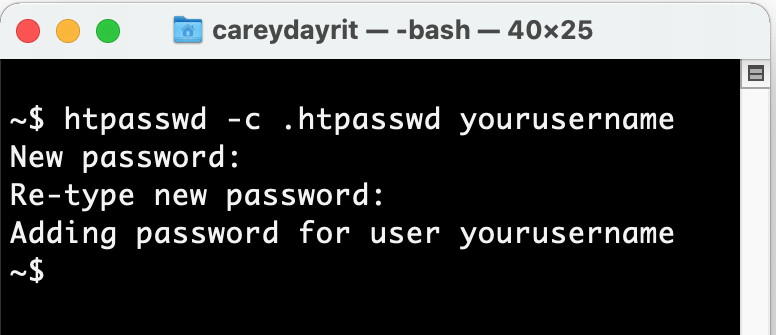
Create a .htpasswd file then upload it to your webroot folder, this is the folder mostly where “.htaccess" resides.

Add this line to your .htaccess file

<Files wp-login.php>
AuthUserFile /.htpasswd
AuthName "Security Lock"
AuthType Basic
require valid-user
</Files>

Add Basic Authentication on the wp-config.php file

Sometimes as customers don’t have access to server configuration and PHP would be the fallback method.

if(preg_match('/(wp-login.php)/',$_SERVER['REQUEST_URI'])){
    if (!isset($_SERVER['PHP_AUTH_USER']) || ( $_SERVER['PHP_AUTH_USER'] != 'yourusername' && $_SERVER['PHP_AUTH_PW']   != 'yourpassword')) {
	    header( 'Cache-Control: no-cache, must-revalidate, max-age=0' );
	    header( 'WWW-Authenticate: Basic realm="Security Lock"' );
        header( 'HTTP/1.0 401 Unauthorized' );          
        exit();          
     }
}