Protecting WordPress login page thru Basic Authentication

Take steps to avoid brute force attacks on the WordPress admin dashboard page. This would add an additional layer to site security and avoid traffic excess. Basic Authentication would facilitate HTTP requests to require a username and a password.

Add Basic Authentication via .htaccess

This is applicable to sites using Apache as the web server, this would not work on hosts with Nginx as their web server. Two simple steps:

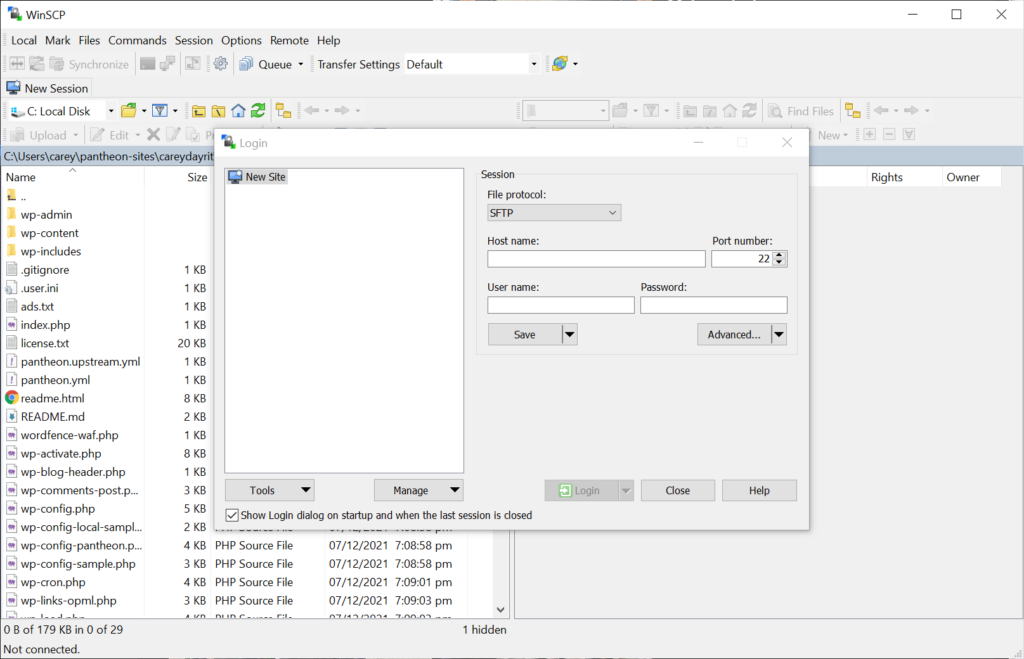
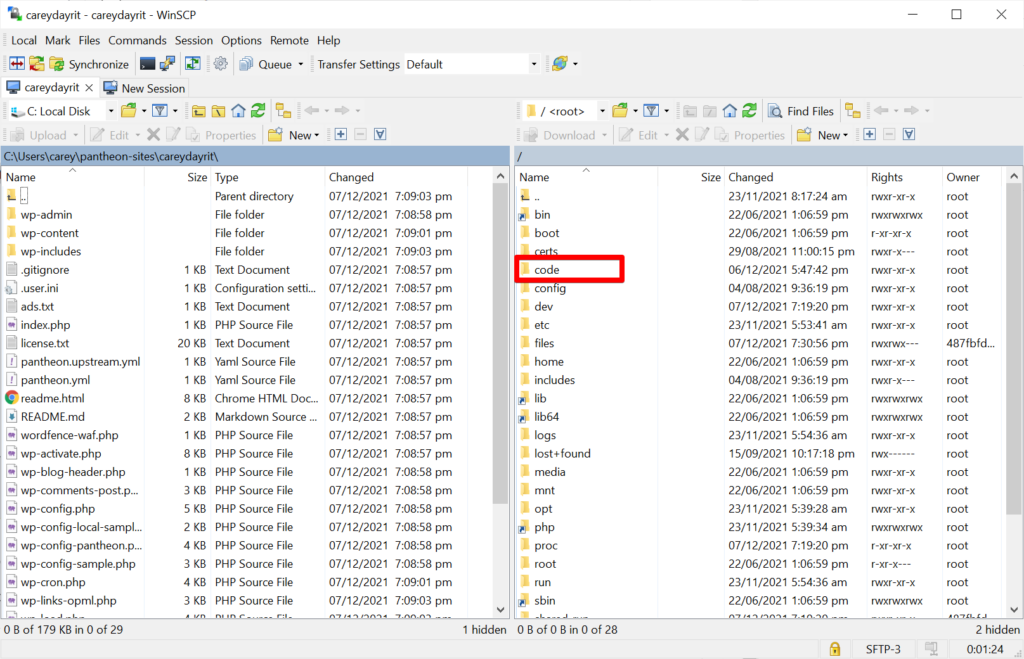
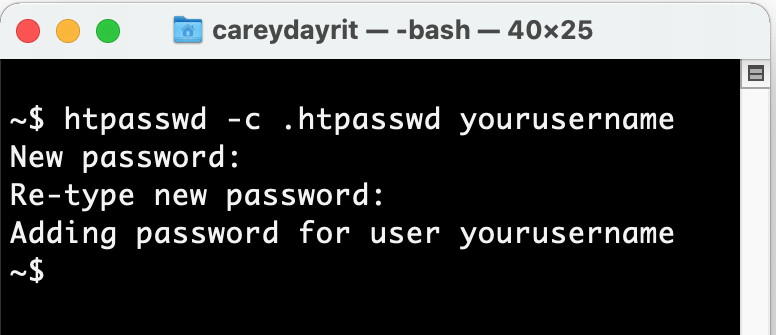
Create a .htpasswd file then upload it to your webroot folder, this is the folder mostly where “.htaccess" resides.

Add this line to your .htaccess file

<Files wp-login.php>
AuthUserFile /.htpasswd
AuthName "Security Lock"
AuthType Basic
require valid-user
</Files>

Add Basic Authentication on the wp-config.php file

Sometimes as customers don’t have access to server configuration and PHP would be the fallback method.

if(preg_match('/(wp-login.php)/',$_SERVER['REQUEST_URI'])){
    if (!isset($_SERVER['PHP_AUTH_USER']) || ( $_SERVER['PHP_AUTH_USER'] != 'yourusername' && $_SERVER['PHP_AUTH_PW']   != 'yourpassword')) {
	    header( 'Cache-Control: no-cache, must-revalidate, max-age=0' );
	    header( 'WWW-Authenticate: Basic realm="Security Lock"' );
        header( 'HTTP/1.0 401 Unauthorized' );          
        exit();          
     }
}

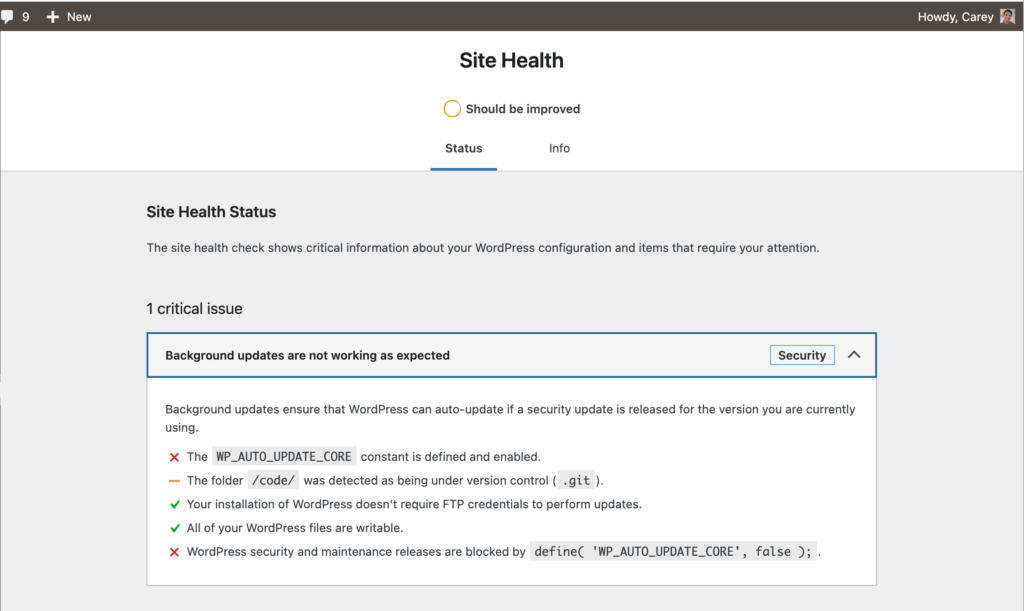
Skipping WordPress Background Updates

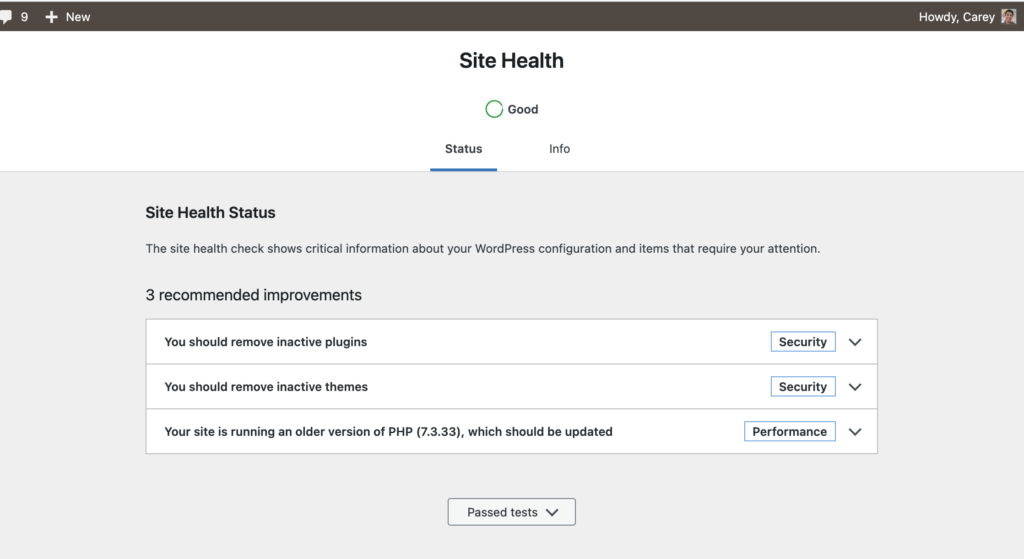
What is Site Health?

The WordPress admin interface is designed to assist end-users in self-servicing their sites by addressing typical setup difficulties and other aspects of maintaining a healthy online presence. It also gives developers a consistent place to store debugging information.

SiteHealth Dashboard

Why the need to skip background updates?

Some hosts, specially Pantheon.io handle the core updates by means of applying upstream updates, or in some common practice, more sites are now in version control using git. Site owners don’t want to ignore the whole time and miss out on potential problems.

Code snippet to skip the update

Create a file named sitehealth.php put it in wp-content/mu-plugins and put these lines of code.

<?php
/**
 * Plugin Name: Sitehealth 
 * Plugin URI: https://github.com/careydayrit/
 * Description: Skip core update on sites using Git
 * Version: 0.1
 * Author: Carey Dayrit
 * Author URI: https://careydayrit.com/
 *
 * @package sitehealth
 */
 
add_filter('site_status_tests', 'skip_background_updates_tests', 10, 1 );


function skip_background_updates_tests($tests){
    unset($tests['async']['background_updates']);
    return $tests;
}

Team Management through Pantheon Terminus

Required Reading: https://pantheon.io/docs/terminus

What is Terminus?

The Terminus command-line interface provides advanced interaction with Pantheon. Terminus enables you to do almost everything in a terminal that you can do in the Dashboard, and much more. This article listed several commands in Terminus 2 that can be used in managing a site’s team using Terminus. First thing first, in all terminus commands we should know how to identify a site to manage it properly.

Getting the Site ID

The site id is an identifier of the site used to route and used by the Pantheon platform to identify the site’s dashboard. To get the site_id you need to login into Pantheon and pick the correct site, to be on the dashboard.

dashboard
URL of Pantheon Site Dashboard

Getting the Site Name

The site name is a machine name, which is a readable name used also to identify a site in Pantheon. The site name is used mostly with the platform URL.

List all team members

terminus site:team:list 

Displays the list of team members for a site. 

site:team:list [–format FORMAT] [–fields FIELDS] [–field FIELD] [–] <site_id> or <site_name>

The command accepts the <site_name> or the <site_id> of the Pantheon site.

The arguments –field and –fields are mostly the same, the difference is the field is just a single field while fields are a group of fields separated by comma(,).

  • email: Email
  • role: Role
  • id: User ID
  • is_owner: Is owner?

The available formats are, without the –format option the default is a table.

  • csv
  • json
  • list,
  • null
  • php,
  • print-r
  • sections
  • string
  • table
  • tsv
  • var_export
  • xml
  • yaml

Add a member

terminus site:team:add

Add a user to the site’s team list.

site:team:add <site_id/site_name> <member> <role>

The member argument should be an email if the email is not associated with a Pantheon account, an invite will be sent.

The role has two choices

  • developer
  • team_member

Change member role

terminus site:team:role

Update a member role on the site’s team.

site:team:role <site_id/site_name> <member> <role>

This command has the same arguments as the add member command but this would only change the role of a user on the site’s team.

Remove a member

terminus site:team:remove

site:team:remove <site_id/site_name> <member>

Removes a member from the site’s team

Using WordPress for eCommerce

Because of this pandemic, the number of people shopping online has multiplied, and it is still rising to this very moment. With nothing else to do, people tend to visit websites that are selling products that they usually want to buy, such as shoes, dresses, electronic devices, and many more. In this article, you will learn Steps on How to Use WordPress as an eCommerce Store.

Knowing that online shopping is a trend, especially in these times, a lot of people want to get involved with it and would want to know how to create an E-commerce store. Well, then let me teach you how to create your very own eCommerce store by using WordPress. Let’s get started then! 

1. Get a Domain Name and a Hosting Provider

Before you can create a website, it is important to have a hosting provider and a domain name first. Your domain name is what appears on the top bar of your browser, just like this:

domain

Some companies only provide domain name registration, but the majority provide both domain name and web hosting services. Some of the commonly good registrars are Domain.com, GoDaddy, and NameCheap. I would not recommend NetworkSolutions though they are fairly good, they don’t support adding IPv6 on their user interface, you need to email them to have IPv6 value to be added to the domain, they called it glue record. Think carefully about your domain name, because it is how people are going to reach your website.

There are hundreds of thousands of web servers available, the most majority of which match the WordPress basic criteria, but picking one out of the crowd can be difficult. WordPress thrives in a rich hosting environment, it would also depend on the requirement of the application, not all hosting is created equal.

For the hosting provider, I suggest that you use Bluehost.com because WordPress.org officially recommends them. All you have to do is go to their website, bluehost.com, fill up the form, and you are good to go. You can also create your domain name on the site.

After creating your account, there will be a button there that indicates “start building”. Click that button, and you will be taken to the back end of your WordPress account.

2. Install WordPress and choose a Theme

Right after you’ve chosen a Host Provider and a domain name for your eCommerce website, you will then have to secure your WordPress website. You can look it up on Youtube to know-how. Now that you are in your WordPress already, the first thing that you must do is to change the theme. The suggested theme that everyone seems to be using is the Astra theme. This theme is basically what other online store websites look like and I’m sure that it is the website that you want to follow.

Astra is a fast, highly customizable, and super clean theme that is designed to convert better and boost your store’s sales. This is the them

3. Install the Woocommerce plugin

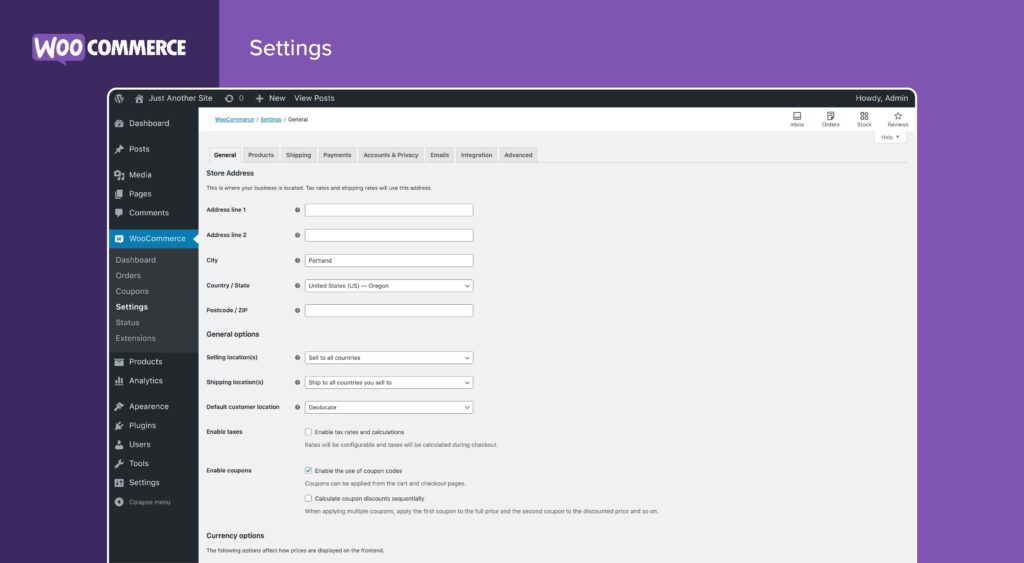
WooCommerce is a flexible, open-source commerce solution built on WordPress.  Based on the plugin page on the WordPress.org website, WooCommerce has over 5 million active installations. It is the most customizable eCommerce platform for building your online business.

Screenshot from the plugin page

WooCommerce isn’t like Shopify or BigCommerce in that it’s not a standalone hosted eCommerce platform. It’s a plugin, or extension, for websites developed using WordPress, the free and open-source content management system that powers the vast majority of websites around the world. It’s simple to get started with WooCommerce once you’ve started creating your website because it’s a plugin. Here’s the URL to their guide https://woocommerce.com/documentation/

Why Choose WordPress for Your Website?

Do you want to start your own blog or create your company’s landing page but you don’t know how? Eyes here, I may have something that can help you. If you want to create a website then I suggest a content management system like WordPress as the software to be used. Let me tell you why.

What is WordPress?

Back when the internet was still emerging, you have to learn how to use codes in order for you to create a website. Codes to change the background of your website, font style, font size, buttons, and many more.

 Now, that we already have advanced technology, we will no longer do codings. We can readily access software such as WordPress, where we can easily create a website. With WordPress, you won’t have to go through coding anymore, you can customize your website and WordPress will automatically do the coding for you. 

WordPress powers over 30% of the entire internet and is one of the most popular website publishing programs in the world. WordPress earned its number 1 spot because it is highly recommended for starters. Many newbies use this software because of its advantages, other than that it is free. WordPress is available online so it is accessible anywhere you are as long as you have access to the internet.

Why is it recommended for beginners?

WordPress has a variety of 11,000 themes and template layouts that would determine the look and style of the website. You are free to choose the themes and layouts that you want. You can tweak the text, choose fonts and font sizes, upload your images or videos, create buttons, and many more so you should try to have fun and explore it a little bit more.

 Whether you like to create a marketing website or a portfolio, plug-ins and widgets are available to help optimize the functionality of your website. It is very beginner-friendly because it has instructions and captions to guide you when you explore and discover the website more. 

Advantage of WordPress

Let us now talk about the advantages of WordPress.

  1. It is free, you can download the software at WordPress.org
  2. WordPress allows you to really own your website and allows you to use your own unique domain name. Some software doesn’t allow you to have your own domain name. An example would be like this, companyname.com or brandname.com
  3. You can use plug-ins and widgets which help in optimizing the functionality of your website.
  4. The monetized ads, where you can earn money if you will be allowed to monetize advertisements on your website. Don’t expect that you will be monetizing your website right off the bat. It will take time and you have to learn more about affiliate links and marketing stuff. If you’re running an online store and you want to use WordPress, it is possible plus WordPress has plug-ins and widgets that enable you to do so.
  5. You will have a variety of choices on what theme you are going to use, you can customize the theme according to your preference. What font styles, size the fonts, font size, colors, buttons you want to add, pretty much everything.

There you have it! If you want to create your own website, you should consider using WordPress. There is a lot of software available online.  Read this article again if you want to weigh the advantages and benefits of other software. Have a nice day!