Basic WordPress Security

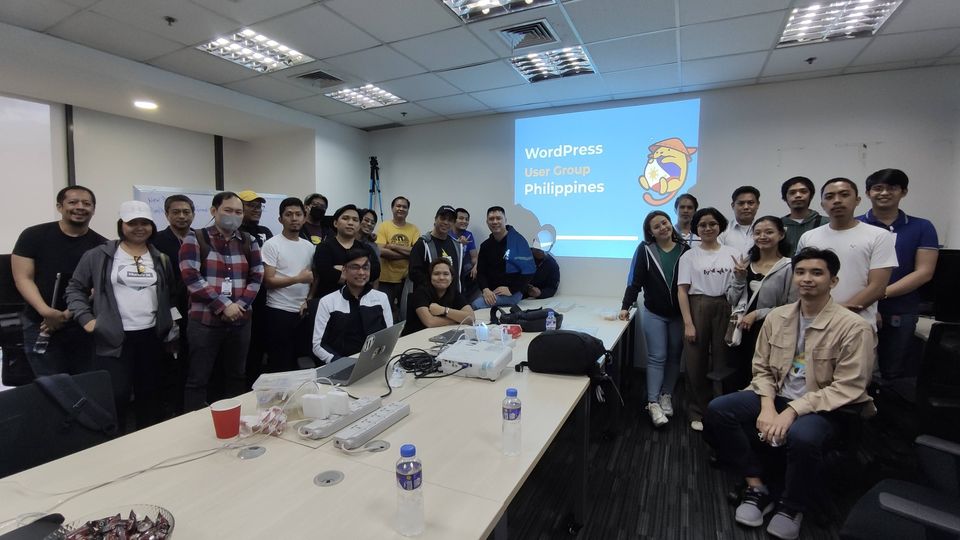
I attended the WordPress User Group Philippines meetup last January hosted by our friends at pantheon.io. I was one of the speakers discussing Basic WordPress Security, so I decided to post it here on my blog.

The need for Security

  • 90% of all Hacked Sites are in WordPress
  • 97% came from plugins
  • 2.4% came from themes
  • .05% came from WordPress Core

Several Basic things you can do to secure a WordPress Site

  1. Use a strong and unique password for your WordPress administrator account, and use two-factor authentication if possible. Here are the top WordPress plugins that implement and manage 2FA that can be used on your site:
  2. Keep your WordPress core, all plugins, and themes up to date, as new versions often include security fixes. Some hosts/platforms offer managed update services:
  3. Use a security plugin to scan your site for malware and vulnerabilities, and to block malicious traffic. Some popular security plugins include:
  4. Use SSL/TLS to encrypt traffic to and from your site. You can get an SSL certificate for free through Let’s Encrypt or some web hosts included in their service.
  5. Use a security service or CDN to block malicious traffic and protect against DDoS attack example are Cloudflare and Fastly. Some web hosts like WP Engine include Cloudflare while Pantheon.io includes Fastly.
  6. Restrict file permissions so only necessary users and processes can read, write, and execute files on your server.  The standard would be to make all writable permissions on the wp-content/uploads folder and deny PHP execution.
  7. Regularly make a backup of the site, so that you can restore it in the event that it is hacked or otherwise becomes unavailable.

Caching 404 pages in WordPress

This is to stop WordPress in handling 404, using headers to manage cache expiry. This code should be added to the theme’s functions.php file.

function template_slug_404_cache() {
	if( is_404() ){
		header( 'Cache-Control: max-age=30000, must-revalidate' );
		header( 'Expires: ' . date( 'D, d M Y H:i:s', strtotime( '+5000 minutes' ) ) . 'UTC' );
		header( 'Last-Modified: ' . date( 'D, d M Y H:i:s', strtotime( '-5000 minutes' ) ) . 'UTC' );        
	}
}

/**
 * Redirect a 404 to a cache page
 *
 * @return void
 */
function template_slug_404_redirect() {
	if ( is_404() ) {
		header( 'Location:' . site_url( '/404' ) );
		exit();
	}
}
add_action( 'template_redirect', 'template_slug_404_cache' );

Be sure that there is a 404.php file on the template directory.

Add a help tab to a WordPress Plugin

This is a help tab that can be found on the WordPress admin dashboard, a custom plugin can have also contextual help that can be found on the rightmost part of the admin screen.

Ever since WordPress Version 3.0, every built-in Administration Panel has contained a contextual help section providing additional information to the user on how to navigate the various settings displayed in that admin panel. This helps WordPress keep the main part of the admin panel clear and concise by eliminating unnecessary text that regular users don’t need to see on a regular basis.

https://codex.wordpress.org/Adding_Contextual_Help_to_Administration_Menus

We should use the Screen class to achieve adding the help tab.

This is a concrete class that is instantiated in the WordPress $screen global. It is primarily used to create and customize WordPress admin screens (as of WordPress 3.3).

https://developer.wordpress.org/reference/classes/wp_screen/

An example function to add a help tab using the WP_Screen class.

function my_add_help_tab() {
	$screen = get_current_screen();
	$screen->add_help_tab(
		array(
			'id' => 'hello_dolly',
			'title' => __( 'Hello Dolly' ),
			'content' => '<p>' . Well, hello, Dolly
It's so nice to have you back where you belong
You're lookin' swell, Dolly . '</p>',
		)
	);
	$screen->set_help_sidebar( __( 'Hello Dolly' ) );
}

There are two methods that are used add_help_tab and the set_help_sidebar. The add_help_tab would add the tab button on the screen and also the left-side title and the content.

The set_help_side_bar would add an additional third column.

Upon activation of an Options page or Menu page, use an action hook and use the callback function.

function my_options_page() {
	$my_menu_page = add_menu_page(
		'Hello_Dolly',
		'Hello Dolly',
		'manage_options',
		'wpl',
		'wpl_options_page_html'  // callback function to display the page
	);
	// Add help bar.
	add_action( 'load-' . $my_menu_page, 'my_add_help_tab' );
}

add_action( 'admin_menu', 'my_options_page' );

That’s all to it.

WordPress 6.0.3

WordPress.org has a new security update. This is a very important release because it fixes most of the XSS (Cross Site Scripting) vulnerabilities.

  • Widget block
  • Feature Image block
  • RSS Block
  • Search Block
  • Stored XSS via wp-mail.php
  • customizer

Another is the sanitation of the class WP_Date_Query. Be sure to update to the latest release. Download the latest version or update via WordPress dashboard.

Add a Section on WordPress Settings Page

The primary location to set up settings for various WordPress website parts is the Settings tab in the WordPress Admin sidebar.

Settings Sub-menu

Listed is the sub-menu for Settings Tab, these are:

  • General
  • Writing
  • Reading
  • Discussion
  • Media
  • Permalinks
  • Privacy

Fields can be added to these pages by creating a simple plugin.


The WordPress functions which would be used are:

register_setting() – this would register our additional options.

add_settings_section() – this would be the section belonging to our custom settings field

add_settings_field() – this would be the custom field

First, we need to use a function that would initialize our plugin.

function wpl_settings_init() {
	// register a new setting for "reading" page.
	register_setting(
		'reading',              // $option_group
		'wpl_setting_example',  // $option_name
		array(
			'array',
			/** 'callback',         // $sanitize_callback. */
		),
	);

	// register a new section in the "reading" page.
	add_settings_section(
		'wpl_settings_section',           // $id
		'WPL Settings Section',           // $title
		'wpl_settings_section_callback',  // $callback
		'reading'                         // $page
	);

	// register a new field in the "wpl_settings_section" section, ins.
	add_settings_field(
		'wpl_settings_option1',           // $id
		'Option 1',                      // $title
		'wpl_settings_option1_callback',  // $callback
		'reading',                       // $page
		'wpl_settings_section',          // $section
	);

	// register a new field in the "wpl_settings_section" section, ins.
	add_settings_field(
		'wpl_settings_option2',           // $id
		'Option 2',                     // $title
		'wpl_settings_option2_callback',  // $callback
		'reading',                      // $page
		'wpl_settings_section',         // $section
	);

}
add_action( 'admin_init', 'wpl_settings_init' );

In my example code, I have added two fields, and here are the callbacks.

function wpl_settings_section_callback() {
	echo '<p>WPL Section Introduction</p>';
}

function wpl_settings_option1_callback() {
	$setting = get_option( 'wpl_setting_example' );
	?>
	<input type="text" name="wpl_setting_example[option1]" value="<?php echo isset( $setting['option1'] ) ? esc_attr( $setting['option1'] ) : ''; ?>">	
	<?php
}

function wpl_settings_option2_callback() {
	$setting = get_option( 'wpl_setting_example' );
	?>
	<input type="text" name="wpl_setting_example[option2]" value="<?php echo isset( $setting['option2'] ) ? esc_attr( $setting['option2'] ) : ''; ?>">	
	<?php
}

Here’s the visual output.

That’s all to it. Happy coding.